Our Verdict
Pros
- Completely redesigned
- Fantastic wheel deck
- Sleek and slimline design
- Little to no flexing with direct drive wheels
- Variety of attachments
- Easier assembly due to no corner brackets
Cons
- Redesign results in a higher price
- Can be slow to assemble or adjust
- Some vibrations at higher frequencies
In this review, I put the Sim-Lab GT1 Pro through its paces to see whether its the best mid-range 8020 sim rig available to buy today.
What is the Sim-Lab GT1 Pro?
The Sim-Lab GT1 Pro is an evolution of Sim-Lab’s mid-range sim rig. The older GT1-Evo that you may have seen around over the past few years has had a complete redesign and is substantially different, resulting in this improved GT1 Pro.
These improvements, in theory, make the new GT1 Pro a much sturdier and more robust sim rig and really elevate it towards becoming a high-end sim rig. However, these changes do increase the price slightly compared to the previous GT1 Evo.
The new GT1 Pro is really aimed at those looking to buy a sturdy sim rig without spending too much. Sim-Lab offers more premium sim rigs, including the mighty P1X Pro or P1-Pro. But really, after spending a lot of time with this GT1 Pro, I think it really gives these premium cockpits a run for their money.
In this Sim-Lab GT1 Pro review, I aim to determine whether this GT1 Pro is the perfect 8020 aluminium profile sim rig for most sim racers.
I do want to say that this sim rig was sent to me by the guys over at Sim-Lab. But as with all of our reviews, that doesn’t affect my thoughts or final recommendation in any way.
Sim-Lab GT1 Pro Cost
So let’s start with the price of this sim rig before I go any further. Because ultimately, a big part of a buying decision is down to budget.
Jumping right in, this Sim-Lab GT1 Pro costs from;
- Europe – €599
- United Kingdom – £519
- United States – $699
- Australia – $851
I say that this price is a “from” price because there are a variety of ways you can customise or upgrade your GT1 Pro. This “from” price is the cheapest price for the most standard configuration.
To give you a hint of what you can add. There are integrated monitor mounts for either single or triple screens. You can also add a Sim-Lab seat such as the Speed 3 I have here. There are also a range of other accessories that all add to the price, such as seat sliders, keyboard trays, shifter mounts and so on.
With an aluminium profile sim rig such as this Sim-Lab GT1 Pro, the options are almost endless. You can keep bolting things to this sim rig and it won’t bat an eyelid at you.
To give you an idea of total cost, the configuration I have here, including the seat and accessories costs just over £1,000 or $1,000.
Going with a figure of around £/$1,000, that is quite pricey. However, compared to comparable sim rigs, this price is about average, if not quite good.
The Trak Racer TR80 starts at £550 or $640 before you add accessories. And Next Level Racing’s GT Elite cockpit starts at around £580 or $699, depending on where you buy it from.
Those prices are almost identical to the Sim-Lab GT1 Pro give or take. So the buying decision then really comes down to the quality, performance and adaptability.
Sim-Lab GT1 Pro assembly and build quality
Before I talk about the performance. I want to touch on the overall build quality, and that all starts with the unboxing and assembly.
Due to the amount of accessories I have, I got sent seven individual packages. One for the Speed 3 seat, a bunch of individually wrapped accessories. And a couple of boxes which included the actual GT1 Pro frame.

Despite the number of boxes, I actually expected the size of the boxes to be much larger. I remember unboxing my previous tubular sim rig. The size of the boxes must have been around triple the size of these Sim-Lab boxes.
The guys over at Sim-Lab have really done an excellent job packaging all of these components with no wasted space whatsoever.
How easy was it to assemble the GT1 Pro?
Assembling it was, well, not the quickest job. But that comes part and parcel with an aluminium profile sim rig. You get a lot of different length pieces of extrusion, and assembling it is like a little jigsaw.
There are also some small fiddly parts which are present with any 8020 sim rig build. Slot-nuts can be a bit of a pain to work with, but once you have the hang of it, you can quickly position them where they need to be.
There is a downloadable instruction sheet available. And this shows every part of the assembly relatively simply. There are images and item codes for everything. I’d recommend sitting down with a coffee and really taking your time to do everything right when assembling.
Thankfully this sim rig is easier to assemble than some 8020 cockpits. A lot of this ease comes down to Sim-Lab choosing to not use any corner brackets.
In older Sim-Lab sim rigs and even the mighty P1-X, corner brackets are included to increase the rigidity. The new angled design of the upright pieces removes the need for these corner brackets. And that really saves time.

The part of the assembly that really took the most time was simply configuring and adjusting the positioning of different components.
And there was one area which was especially annoying and that was the seat slider. This part alone took me around an hour due to both the seat sliders themselves being incredibly stiff. And the annoying process of installing the lever itself which was not easy due to having to bend it into shape.
Other than that one part, everything came together as intended. You do also get a lot of choice over where to mount different parts of the rig such as the vertical uprights for the wheel deck and pedals. So you will almost certainly spend a good hour or so simply readjusting the position of everything!
Design and aesthetics
So moving onto the overall design, the clean exterior really looks the part.
All aluminium profile rigs naturally have a very industrial look to them. However, designing everything in such a sleek and seamless way softens the overall design.
This Sim-Lab GT1 Pro looks clean and crisp, and actually incredibly high-end. All pieces of aluminium are coated in black, and the end pieces are capped in black plastic. Despite looking quite industrial, everything is quite soft to the touch thanks to the round edges and flush fitment.

Throughout the entire design, the chosen aluminium profile is 80 x 40mm, despite me keeping referring to it as 8020. Some sim rigs stretch the size of their profile to 120 x 40mm or even 160mm width.
80 x 40mm is really a great size. It allows for flex-free sim racing even with a powerful direct drive racing wheel. And it gives a less overwhelming design. Larger aluminium profiles such as those on the P1-X can sometimes make the sim rig look pretty bulky. That isn’t an issue here.
Wheel plate
Throughout this review, you’ll see me using different wheel plates. I switch between using an Asetek wheel mount and the included wheel plate.
The included wheel plate that comes with the Sim-Lab GT1 Pro is mounted to both upright sections with no overhanging wheel mount.
This is a huge improvement over the older GT1 Evo. The older sim rig had the wheel plate hanging right out away from the horizontal mount. While not a massive issue, it was a point where a little bit of excess flex could creep in.

With the new design, the racing wheel is mounted centrally between the uprights. This leads to a much sturdier platform.
It is worth noting that the wheel deck comes pre-drilled and can fit pretty much every wheel base I threw at it. When I ran a mid-powered racing wheel such as the Fanatec CSL DD or Logitech Pro wheel. I didn’t encounter any flex in the wheel mounting whatsoever.
I then moved on to mounting my Asetek wheel base using Asetek’s own mounting plate. This attaches to both sides of the vertical aluminium profile easily. The only reason I chose this route is to be able to mount the Asetek wheel base from the front rather than the bottom.
Pedal plate
Moving down to the bottom of this GT1 Pro sim rig, the pedal plate is another area that has been redesigned.
It looks a lot nicer as the chunky pieces of aluminium profile that previously held the pedal plate up have been swapped for a more streamlined frame. This is a nice choice aesthetically and doesn’t reduce any stability.
The pedal plate itself has also lost some weight and is thinner than the older GT1 Evo pedal plate. I mainly used a set of Asetek Forte load cell pedals during testing, and I encountered zero flex at any point of the pedal plate.

There is a lot of adjustability in the positioning of the pedal tray. You can adjust the angle of your pedals using the rear bracket and the vertical strut. A lot of adjustability allows you to set up either a GT or semi-formula position.
There isn’t quite as much adjustment as you find in something like the Next Level Racing F-GT Elite Lite. But that’s not really a fair comparison, as the F-GT Elite Lite has special mounting brackets to elevate the pedal plate.
Much like the wheel deck, the pedal plate is also pre-drilled to accommodate the majority of sim racing pedals. I had no issue mounting my Fanatec CSL pedals or my old ClubSport V3 pedals. And even the newer Asetek pedals went on without issue.
Shifter and handbrake mount
As standard, the GT1 Pro comes with an additional horizontal piece of aluminium extrusion that is also supported vertically. This is designed to be a base for mounting any additional peripherals such as a handbrake or shifter.
The extra shifter mount that I have mounted to this horizontal bar is optional though. Although with it being extrusion, you can mount a variety of different mounts if you already have one.
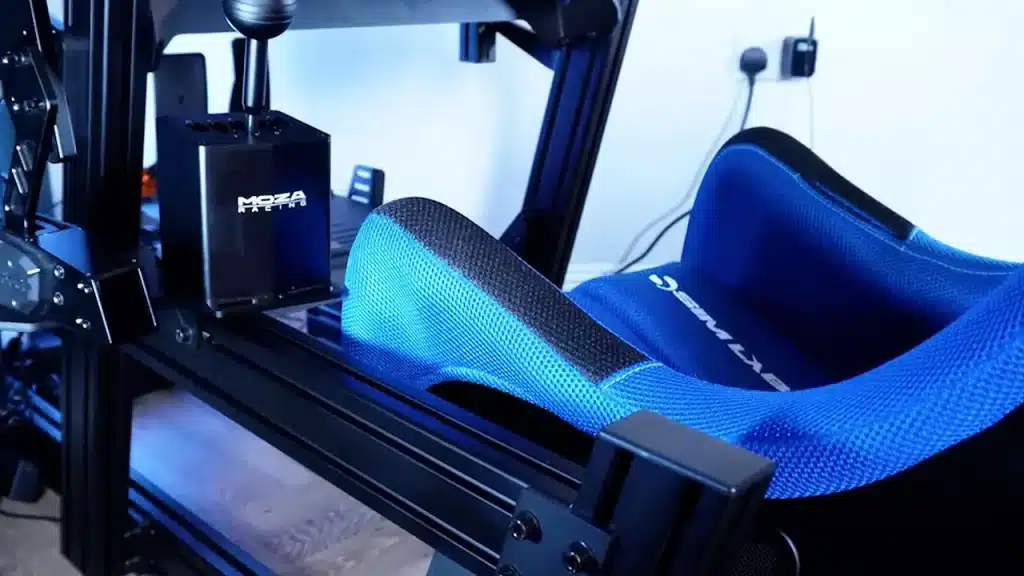
This horizontal strut is a big improvement over the GT1 Evo. And the addition of the vertical support strut is huge. The old sim rig wasn’t supported vertically, meaning some flex crept into the end of the shifter mount.
That isn’t an issue with the GT1 Pro, allowing for aggressive shifts and pulls on the handbrake with zero flex. I feel confident that I could easily mount multiple peripherals to this without any worry of flexing.
Integrated monitor mount
The monitor mount I opted for is the single integrated mount. This is capable of holding large single monitors including the ultrawide I have here.
There is a standard Vesa mount included making mounting super easy, and much, much easier than some monitor mounting solutions!
As with almost every part of this cockpit, the monitor mount is another area that has seen a significant redesign. And it really improves on the older solution.

The majority of the monitor mount is constructed from 40 x 40mm pieces of profile. These are then mounted to the vertical uprights of your sim rig via two custom brackets.
These allow for a lot of adjustment over how close you mount your screen. Combined with the adjustment vertically available with the two vertical 40 x 40mm lengths, you have a lot of adjustment.
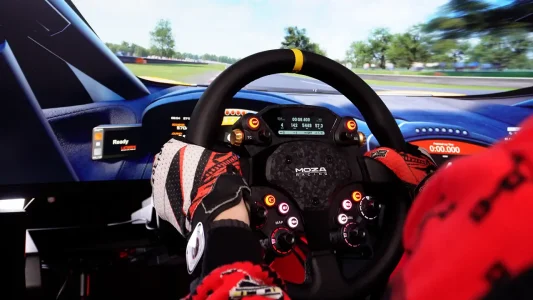
During use, you can see from my gameplay footage that movement was minimal. There is a little bit of movement, mainly through higher frequency vibrations such as riding a kerb. This is almost always inevitable when mounting your screen to any sim rig.
I do really prefer mounting my monitor to my sim rig as it reduces the need for other equipment which takes up space. This mount is a really tidy solution and something I was really impressed with.
Sim-Lab Speed 3 Bucket Seat
Bringing this whole sim rig together is the Speed 3 seat. This was an optional extra at around £350 / €390. And this is one area of this Sim-Lab setup that impressed me the most.
The seat itself is a fibreglass bucket seat very similar to real FIA-approved seats found in real-world race cars. Being an all-in-one seat, it is a little snug regarding width. I can see this being uncomfortable for some, but it seemed to fit me pretty well.

There is a lot of foam padding at both the bottom and the backrest. This makes it really comfy during longer play sessions and I rarely felt the need to get up and stretch.
The fabric itself is a sort of mesh fabric which feels a little rough to the touch. That’s not a bad thing though as it is super comfy to sit in and it allows some heat to dissipate to keep you cool.
You can tell that this isn’t an FIA-approved seat due to the addition of a neat little phone pocket on the right of the seat. Something that probably isn’t needed when competing in a real-world GT race! To be honest, I rarely used this, but it’s a neat little storage feature.
Overall, I couldn’t ask for much more from a seat. There are even the correct gaps for a 5-point harness to be attached if that tickles your fancy.
Adjustability
And that leads me nicely onto the overall adjustability in this whole Sim-Lab GT1 Pro sim rig. As I mentioned during my assembly part of the review you do get a choice over the positioning of some parts.
I would really recommend getting the seat mounted so you can start to build your driving position around that.

Try out the wheel mounting position and adjust that to ensure it is correct. The pedal and rear vertical part are both dictated by the positioning of this main upright.
I would say it’s important not to tighten the bolts too much and try to move them along the lower frame. This can cause some scratches if you try to adjust the position in this way.
Instead, try to loosen off the bolts as much as possible or completely remove the vertical piece of profile and manually adjust the slot nut position.
How does the Sim-Lab GT1 Pro sim rig perform during sim racing?
OK, so now I’m moving on to the big part of this review. Just how well does the Sim-Lab GT1 Pro perform during racing? So I want to start by saying I tested this sim rig with a few different racing wheels.
Primarily I used the Asetek Forte which is an 18Nm direct drive wheel. I also used the Fanatec CSL DD using the wheel deck that was included.
Wheel mount flex
I’m going to start by talking about any potential flex in the wheel mount.
You can see in this close shot that during use with my Asetek wheel dialled up to the maximum, all movement comes from the Asetek mount itself.
This is only apparent when physically pushing and pulling on the wheel. During racing, there is pretty much zero flex or movement. The only real movement is in the vertical uprights when peak forces are being generated. For me, this is easily acceptable.
When using the Fanatec CSL DD at 8Nm with the supplied Sim-Lab mount, the results are just as good. Granted, this wheel base isn’t as powerful as the Asetek one, but it does highlight any differences in the wheel plate itself.
Again, when artificially pushing and pulling the wheel, there is a small amount of flex or rotation in the wheel deck. But during driving, there’s almost nothing.
Pedal plate flex
OK, so moving on to the pedal plate, this is another area where flexing is common among sim rigs. With this GT1 Pro, the pedals are mounted via two custom-made brackets that attach to the main horizontal struts.
This gives them a really solid platform and you can see during use there is only very minor movement. I’m using a set of load-cell Asetek pedals here and pushing as hard as I can on the brake.
This solution isn’t quite as sturdy as mounting to direct pieces of a profile as the Sim-Lab P1X Pro does. But this mounting solution looks cleaner in my opinion. And the levels of flex are easily acceptable.
Shifter mount flex
Finally, I want to show the improvement of the shifter mount. The addition of a vertical support beam really solidifies the shifter mount.
You can see during this gameplay that there is zero flex or movement in this part of the sim rig. Even when I pull pretty aggressively on the handbrake or shifter there is no movement.
Can you use a direct drive racing wheel with the GT1 Pro?
As shown with me using an 18Nm Asetek racing wheel, you can comfortably use a high-end direct drive racing wheel with the Sim-Lab GT1 Pro. The rigidity throughout the cockpit is great with little to no flex.
Compatibility with various peripherals
When it comes to choosing which peripherals to use with this Sim-Lab GT1 Pro sim rig, you have a pretty wide choice. Both the wheel deck and pedal plate are pre-drilled and can accommodate a huge number of sim racing gear.
I had no issue mounting any of my gear, including Fanatec, Asetek and MOZA Racing products. The aluminium profile itself can also accommodate pretty much any attachment that can be screwed on. I can’t really see any issue with attaching anything to this cockpit.
Sim-Lab also sells a range of accessories, from keyboard mounts to button box holders, giving you some first-party attachment upgrades.
Is the Sim-Lab GT1 Pro sim rig worth buying?
That brings me to my final conclusion and, ultimately, whether I would recommend the Sim-Lab GT1 Pro. And I have to say that this is a sim rig that is punching well above its weight.
The improvements and the redesign really allow this sim rig to shine and perform incredibly well, even with higher-end sim racing equipment.
In fact, if I were a P1-X sim rig, I would be worried, as this GT1 Pro really gives more expensive cockpits a run for their money. This GT1 Pro provides a more slimline appearance than the P1-X but doesn’t sacrifice rigidity.
At around £/$200 cheaper than a P1-X, I might even recommend this GT1 Pro sim rig over the more expensive options. This sim rig can really accommodate anything you throw at it, and it will ultimately serve you well for many years.
Technical Specifications

Review written by Felix König